Send Emails from Your SAP CAP Application Using Nodemailer


Introduction
In this tutorial we integrate Nodemailer with SAP CAP for sending emails. To test this, we run smtp4dev in a docker container.
Prerequisites
Ensure you have a development environment set up for CAP, described here, as well as Docker, described here.
SMTP4Dev Setup
Start pulling and running smtp4dev using the following
docker run -d -p 5000:80 -p 2525:25 --name smtp4dev rnwood/smtp4devTo verify this is running and working, run the following to view the smtp4dev logs:
docker logs -f smtp4devThen, in another terminal, run the following:
#!/bin/bash
SMTP_HOST=”localhost”
SMTP_PORT=2525
SENDER=”sender@127.0.0.1”
RECIPIENT=”recipient@127.0.0.1”
TIMESTAMP=$(date +%Y%m%d%H%M%S%N)
TIMESTAMP=$(date +%Y%m%d%H%M%S%N|cut -c 1-16)
echo $TIMESTAMP
curl --url “smtp://$SMTP_HOST:$SMTP_PORT” \
     --crlf \
     --mail-from “$SENDER” \
     --mail-rcpt “$RECIPIENT” \
     --upload-file - <<EOF
From: “Sender” <sender@example.com>
To: “Recipient” <recipient@example.com>
Subject: $TIMESTAMP

$TIMESTAMP
EOF
You should get some log lines as follows:
[INF] SMTP session started. ClientAddress: ::ffff:172.17.0.1
[INF] SMTP authentication successful - any credentials allowed. ClientAddress: ::ffff:172.17.0.1
[INF] SMTP authentication successful - any credentials allowed. ClientAddress: ::ffff:172.17.0.1
[INF] SMTP message received. ClientAddress: ::ffff:172.17.0.1, From: noreply@yourcompany.com, To: customer@example.
com, SecureConnection: false, DeclaredSize: null
[INF] Processing received message for mailbox ‘Default’ for recipients ‘[”customer@example.com”]’
[INF] Message processing completed. MessageId: “de0b284a-f956-4a05-8e9c-7b8b1136d75b”, Mailbox: Default, ImapUid: 9
00
[INF] SMTP session completed. ClientAddress: ::ffff:172.17.0.1, MessageCount: 1, Duration: 59.5304ms
Alternatively, try out the web interface at
http://localhost:5000
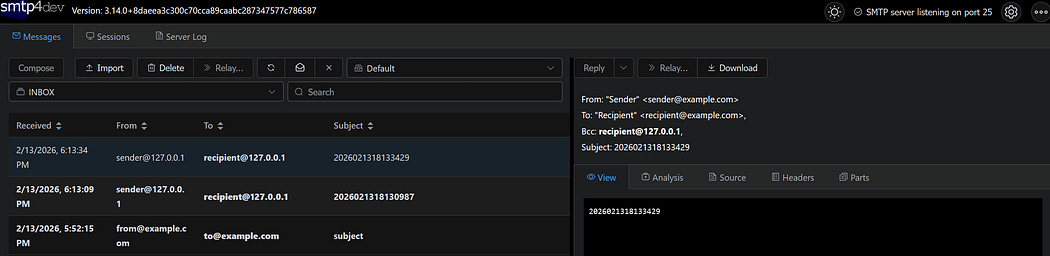
The smpt4dev Web Interface
CAP Project Setup
Create a new CAP project and install dependencies:
# Create project
cds init email-integration
cd email-integration
npm install nodemailer
npm install dotenv --save-dev
We will use nodemailer for sending emails and use dotenv for managing environment variables.
Configure Environment Variables
Create a .env file in your project root and set up the following environment variables based on your smtp4dev configuration:
SMTP_HOST=127.0.0.1
SMTP_PORT=2525
SMTP_USER=”dummy”
SMTP_PASS=”1234”
SMTP_SECURE=false
SMTP_TLS_REJECTUNAUTHORIZED=false
Ensure the SMTP values match up with your smtp4dev container. Add .env to your .gitignore if you plan on committing:
echo “.env” >> .gitignoreTo actually use the above settings, create a ./srv/server.js file in your project root to load the environment variables from the .env file:
// Load environment variables from .env file
require(’dotenv’).config();
const cds = require(’@sap/cds’);
cds.once(’bootstrap’, app => {
});
module.exports = cds.server;
Define the Data Model
Next we will define the data model in db/schema.cds:
namespace com.email;
entity Email {
  key ID:UUID;
      ![from]:String;
      to:String;
      subject:String;
      html:String;
}
The scenario above is a very simple test schema. Note that we use ![from] instead of from because this is a reserved keyword.
Define the Service
Create srv/email-service.cds:
using{com.email as db}from’../db/schema’;
service EmailService{
 entity Email as projection on db.Email;
}
Create Email Service Module
Create srv/email-service.js:
const cds=require(’@sap/cds’);
const nodemailer=require(’nodemailer’);
module.exports=async(srv)=>{
 const{Email}=srv.entities;
 const transportOptions={
  host:process.env.SMTP_HOST,
  port:process.env.SMTP_PORT,
  auth:{
   user:process.env.SMTP_USER,
   pass:process.env.SMTP_PASS
  },
  secure:process.env.SMTP_SECURE===true,
  tls:{
   rejectUnauthorized:process.env.SMTP_TLS_REJECTUNAUTHORIZED===true
  }
 };
 const transporter=nodemailer.createTransport(transportOptions);
 srv.after(’CREATE’,Email,async(email,req)=>{
  const mailOptions={
   from:email.from,
   to:email.to,
   subject:email.subject,
   html:email.html
  };
  try{
   await transporter.sendMail(mailOptions);
   console.log(`Email sent for email ${email.ID}`);
  }catch(error){
   console.error(`Failed to send email: ${error.message}`);
  }
 });
};
Deploy and Test
Now you can deploy the database with cds deployand run the server using npm run start .
You can send emails by creating an Email entity as follows:
#!/bin/bash
curl -X POST “http://localhost:4004/odata/v4/email/Email” \
     -H “Content-Type: application/json” \
     -d ‘{
           “from”: “from@example.com”,
           “to”: “to@example.com”,
           “subject”: “subject”,
           “html”: “test”
         }’
You can verify this by checking out the smtp4dev web interface. The sent Emails will be persisted in the database, and you can inspect them using the following:
#!/bin/bash
curl “http://localhost:4004/odata/v4/email/Email”